post

Garage Door Freshen Up

It is the time of year when you look at the garage door and realise that it has faded quite a lot. Rather than change it’s colour, why not paint it the same colour if you like it just to give it a freshen up.
On this job, the frame needed a new piece of wood splicing in and filling all around, along with some general pick off of old paint layers followed by some filling and sanding. Then the new bare wood needed priming before the whole frame was undercoated and finally glossed in white.
Once that was done, the door got a really thorough sanding as it had lots of little bits on it from the previous paint job. Possibly it was done on a windy day and the dust got up. Once sanded it was undercoated in Crown’s Full Undercoat in dark grey and then glossed in black using a paint by Permoglaze.

NB… Never gloss over an old gloss, even with it being the same colour like this was. It just doesn’t work!

Customer was thrilled and I too thought that it looked really good. Do you need yours doing? If you do, you know what to do… Contact me 😉

post

Front Door and Gate Refurbishment

In Autumn 2015, I painted the masonry and windows on this property.
It’s now Spring 2016 and I am back to give the Front Door and Side Gate a total makeover.

Firstly, everything got a proper rub down and imperfections were filled and sanded down.
I then applied a white undercoat, but when going from a dark to a light colour, it is almost impossible to do it in 2 coats, so while I was at it, I gave the door and gate a second undercoat to ensure the black had disappeared as much as possible.
The following morning, I glossed the framework and spindles in white and I loved how the spindles came to life compared with their old look.
Then the doors had a gloss coat of Dulux ‘Moorland Magic 5’. I knew when doing the top coat that I was still not going to be 100% happy with the finish, so I popped back for an hour the following morning and put another top coat on them for a great look and a great finish.

So after 4 coats of paint, we are there and I think it looks great. If you do too, you know what to do… Contact me 😉

post

Stone Circle

This customer is starting the process of doing some landscaping in their relatively new garden and having a stone circle is just the first step in their journey.

To work out where to position the circle, I took the centre of the angled fence panel and used a string line and large set square to find the perfect central point. Once the centre was decided, the digging out could commence. In this case the grass and topsoil were moved to another location, otherwise a small skip would have been required. With the sharp sand in, I was able to lay out a few slabs and get things set up nicely before laying the slabs on a compacted sharp sand and cement layer.

At the end, a wet mix of sand and cement was made and all the joints were filled in and swept off.

This job took 2 of us 1 day to complete.

post

Solid Oak Flooring

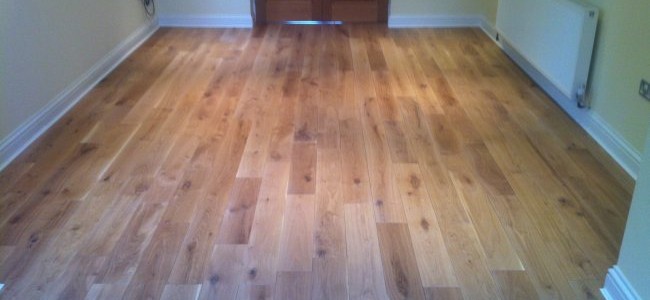
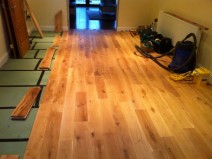
This beautiful solid oak floor was laid in a dining room in Bromham.

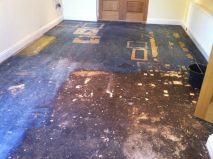
The customer had done a great job of clearing the room of everything including the carpet. I then came along and put a primer/sealer on the old floor which helps bind the screed to the existing floor. The screed went down quite quickly and was smoothed out around the room. This is always an important part of the process as any dips and bumps will show up when it comes to laying the floor, if you don’t level it out as much as possible.

The following day I went back to lay all the fibreboard underlay and then I put all the oak, evenly spaced, in the room and left it there for two whole weeks. This is really important as the wood will acclimatise in this time and there will be much less expanding or shrinking as a result.

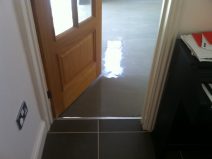
When laying the oak, we left a 10mm gap all the way around the room to allow for any expansion. We made 2 thresholds for the doorways and my calculations were perfect when it came to the height of the floor marrying up with the other rooms behind the doors. Talking of doors, they were marked along the bottom by offering up a plank of wood to them before we started so the doors could come off for the duration of the laying. They were then shaved and re-fitted at the end.

The final touch was to pin in place a white scotia edging, giving the floor the finished look.

My thanks to Dan, my carpenter/joiner for helping so much with the laying of this floor.

post

Slab Path

This was a great job for many reasons. The main one being the happiness on the faces of the customers at the end.

The stones were pushed aside to reveal the old wobbly crazy paving in all its glory. Then it was taken up! The area was levelled out and was pegged in various places along the pathway so we always had an aim point to head for.

Some real care was taken to cutting around the circular bricks at the house end and also in the places where the direction of the path had to change to get us all the way around the bend. It was all about bisecting the angles. Very school days.

My thanks to Stuart, my trustworthy colleague, for his effort on this as we were all done and washed down in one day.

Do you need a path doing? Get in touch by clicking here.